A Mutable Log
A blog by Devendra Tewari
Project maintained by tewarid Hosted on GitHub Pages — Theme by mattgraham
Build a custom embedded Linux system using Buildroot
In this post I build a custom embedded Linux bootable CD that I can run in an x86 VM. I would like to appreciate the help I received from the official documentation.
Obtain Buildroot
Get buildroot. I use version 2011.02 in this post. My build machine is a Virtual Box VM running Ubuntu 10.04 LTS. I have Virtual Box Guest Additions installed, which I use to access a shared folder on the host OS, to get files in and out of the VM.
To configure Buildroot, you’ll require several packages. make is one, but most Linux installations have that already.
You’ll certainly require ncurses
sudo apt-get install libncurses5-dev
You’ll probably need to apt-get a few additional packages along the way.
Configure Buildroot
To configure Buildroot, you need to run make menuconfig in the folder you extracted it.
These are the options I used
- Target architecture - i386
- Target architecture variant - i686
- Kernel - Kernel version: 2.6.37.2, Kernel configuration: Using a defconfig, Defconfig name: i386
- Target filesystem options - ext2, iso image
- Bootloaders - grub
Exit and opt to save the configuration file.
Build
Run make once you are done saving the Buildroot configuration. The build process takes some time because it downloads lots of different things required to build the toolchain, Linux kernel, and the root filesystem. Go and have some coffee. You can speed up the build process by setting up the Virtual Box VM to use multiple cores on the host PC, and allowing Buildroot to run as many jobs as you have cores (default setting is 2). This is done using make menuconfig under Build Options, Number of jobs to run simultaneously. Using multiple cores can be buggy, I have had my VM freeze several time.
Run embedded Linux
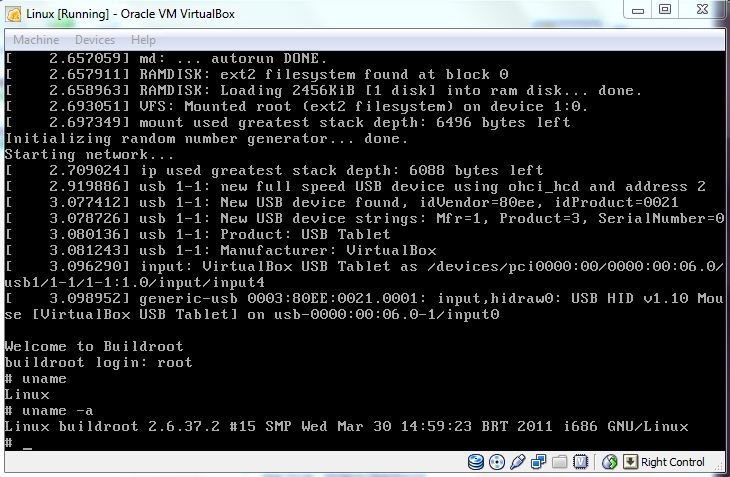
Copy the iso file rootfs.iso9660 from the output/images folder to the host machine as rootfs.iso. Create a new Virtual Box VM and set the iso file as the CD/DVD drive. Start the new VM. If all goes well (it won’t) you’ll get the login prompt where typing root should let you in to the command line. This first time you’ll not be able to get in because we did not configure the Linux kernel for the ext2 filesystem. Let us see how to do that now.
Configure the Linux kernel
You have built once and all kernel sources should be available at the folder output/build/linux-2.6.37.2. The kernel build configuration file .config is located in that folder. To change that configuration we’ll need to do two things - modify the linux configuration using make linux-menuconfig, and modify the Buildroot configuration for the kernel to use that configuration file during the build.
To modify the Linux configuration, invoke make linux-menuconfig from the Buildroot root folder. Head over to File systems and select Second extended fs support. Exit and save the configuration.
To modify the Buildroot configuration to use the new kernel configuration, execute make menuconfig. Head over to Kernel, Kernel configuration, and select Using a custom config file. Change Configuration file path to output/build/linux-2.6.37.2/.config. Exit and save the Buildroot configuration. Build, copy the resulting iso file to the host OS and run the test VM. You should now be able to log in as root.

Next steps
Now, you can modify your custom embedded Linux kernel to support other devices you’ll need, deploy it to hardware… sky’s the limit!
Kudos to Fabio Urquiza for helping figure a few things out.