A Mutable Log
A blog by Devendra Tewari
Project maintained by tewarid Hosted on GitHub Pages — Theme by mattgraham
Driving an LED with a Raspberry Pi
I recently began tinkering with a Raspberry Pi Model B rev2. This post shows how you can drive an LED using the GPIO pins on a Pi running Raspbian. If you are unfamiliar with Pi take a look at their quick start guide.
GPIO Pin Numbering
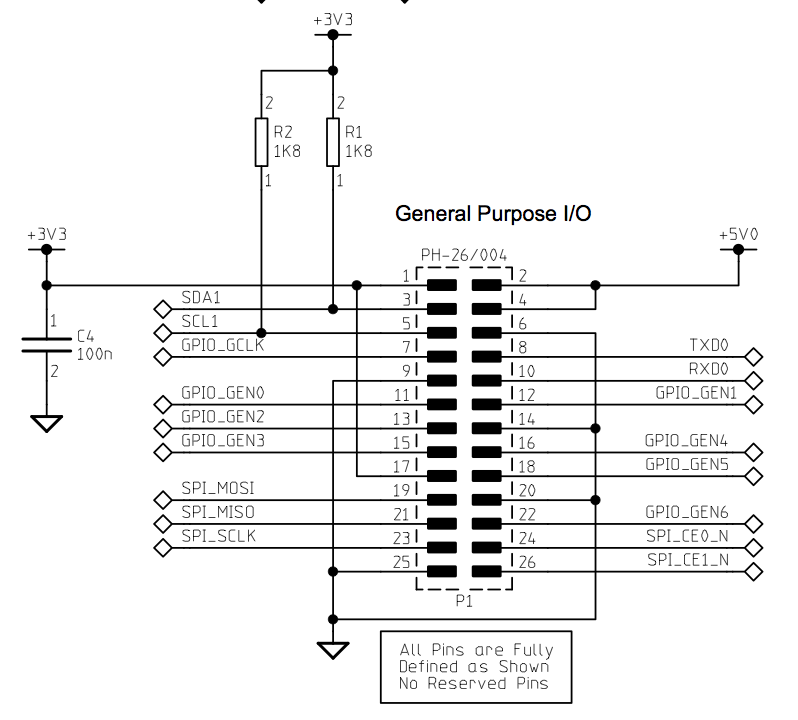
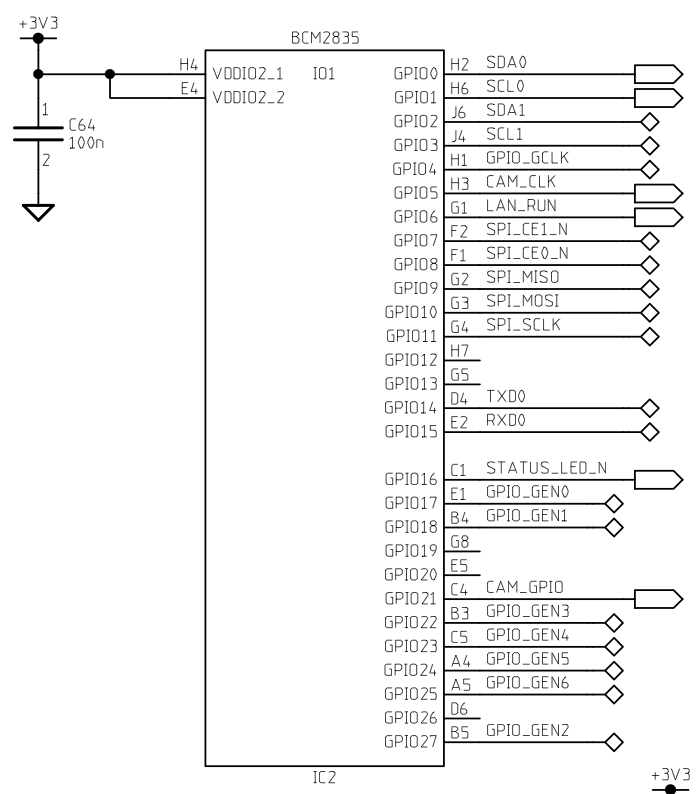
There are two ways to specify the GPIO you want to control. One is based on the numbering of the pin on the P1 connector, the other is based on the Broadcom SOC (BCM2835) GPIO numbering. For instance, pin 12 on P1 connector corresponds to pin GPIO18 on BCM2835.
This can be derived from the screenshots of the schematic below, and is also documented elsewhere on the internet for easier consumption.
RPi.GPIO Python module
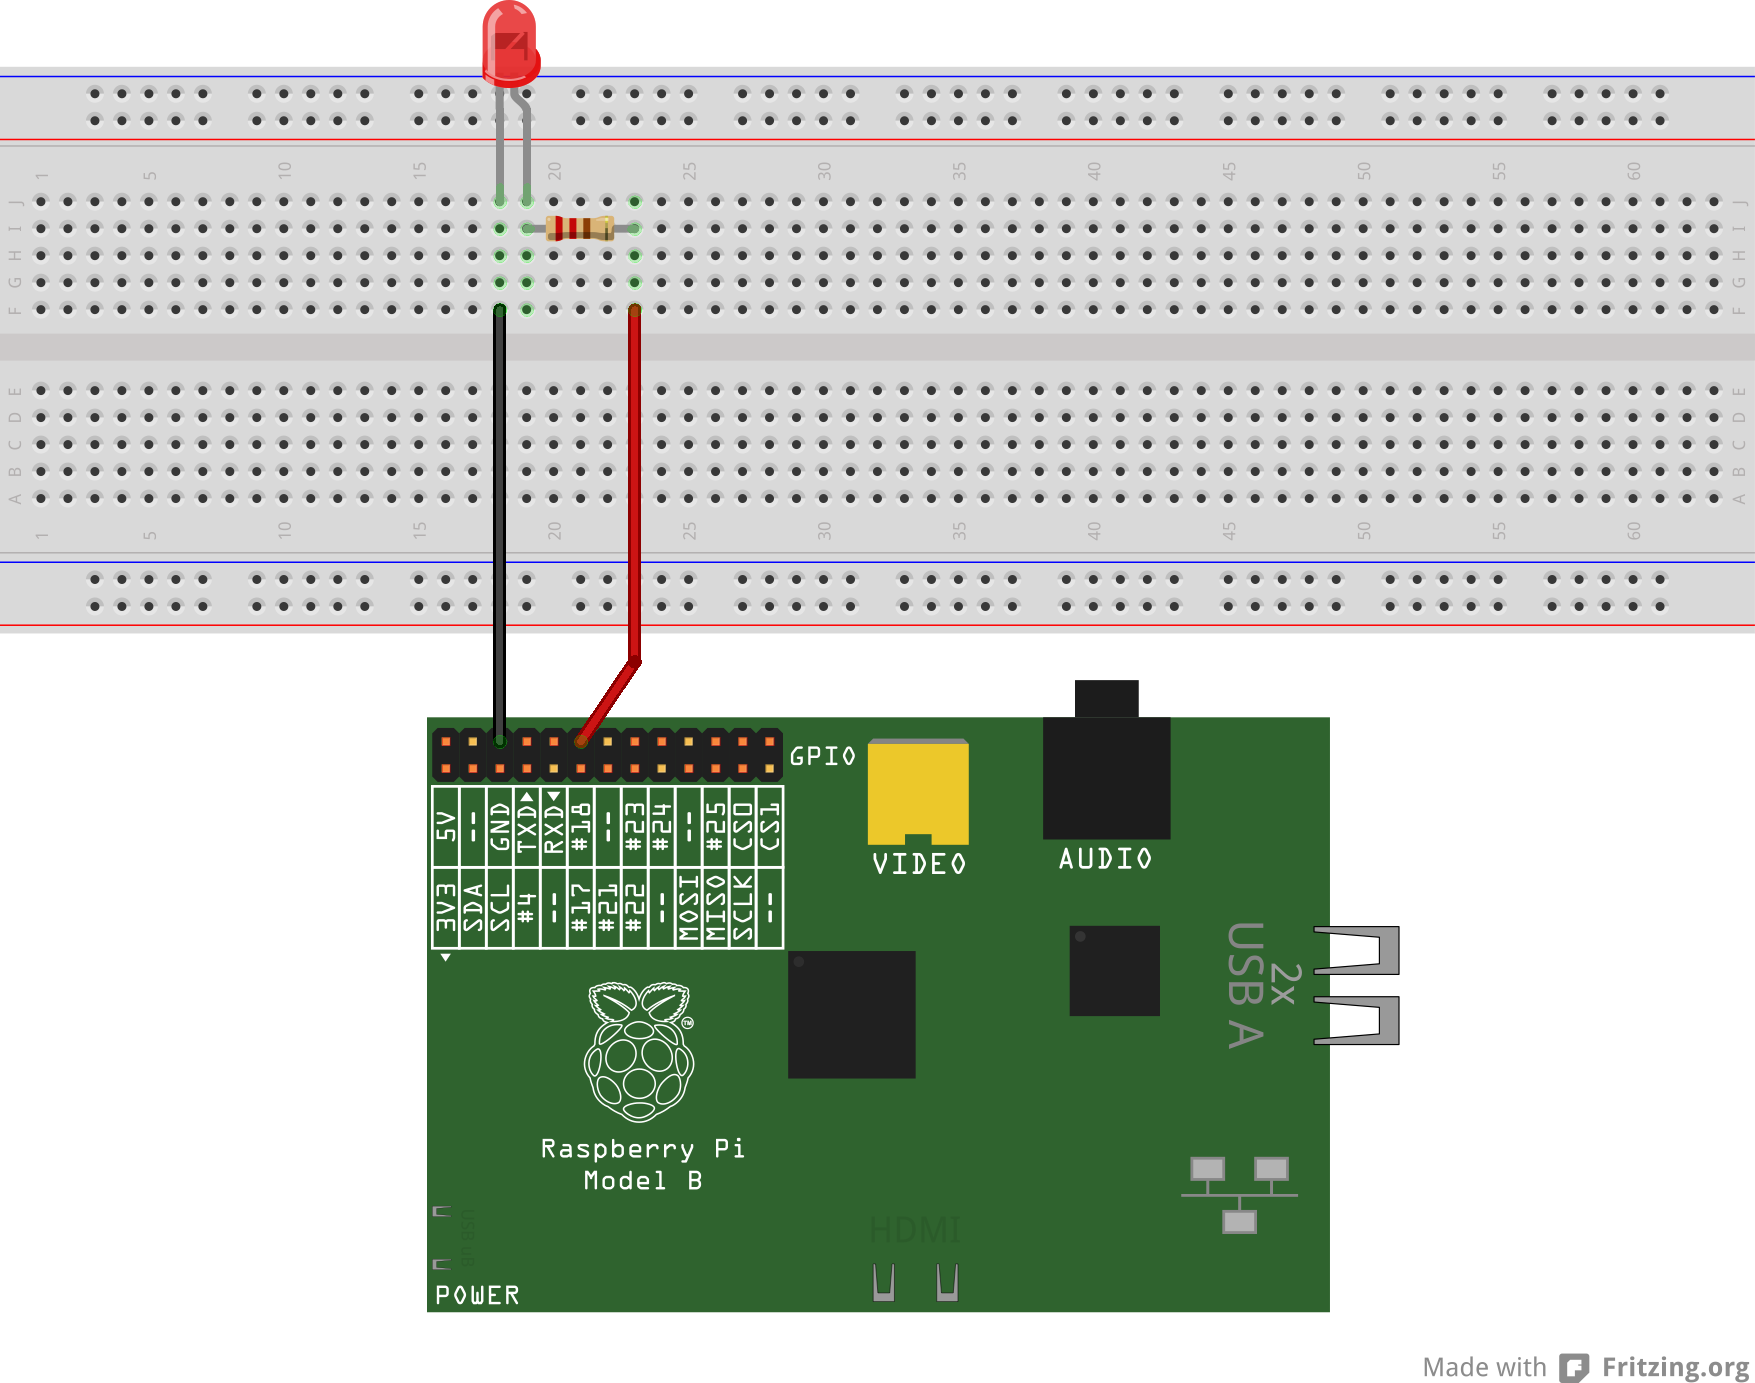
The RPi.GPIO module is available on Raspbian. Let’s assume you connect the LED as shown below. I have come to realize that the current driven by GPIO is low enough, that you can drive the LED shown without need for a resistor in series.
This is how you can blink an LED using P1 connector pin numbering, on the command line.
import RPi.GPIO as gpio
gpio.setmode(gpio.BOARD)
gpio.setup(12, gpio.OUT)
gpio.output(12, gpio.HIGH)
gpio.output(12, gpio.LOW)
This is how you do the same thing using BCM2835 GPIO numbering.
import RPi.GPIO as gpio
gpio.setmode(gpio.BCM)
gpio.setup(18, gpio.OUT)
gpio.output(18, gpio.HIGH)
gpio.output(18, gpio.LOW)
The project Wiki has many more examples.
Using GPIO filesystem
You can achieve the same result from the shell using the GPIO filesystem under /sys/class/gpio. The pin number needs to be the GPIO number specified for BCM2835. You cannot do PWM with this mechanism, except at very low frequencies.
sudo echo "18" > /sys/class/gpio/export
sudo echo "out" > /sys/class/gpio/gpio18/direction
sudo echo "1" > /sys/class/gpio/gpio18/value
sudo echo "0" > /sys/class/gpio/gpio18/value
sudo echo "18" > /sys/class/gpio/unexport
The first two lines initialize and set the direction for GPIO18. The possible values for direction are “in” and “out”. This approach can be used from any programming language, using its text file input/output implementation.
If you have installed mono i.e. sudo apt-get install mono-complete, you can use csharp shell to achieve the same results
using System.IO;
if(!File.Exists("/sys/class/gpio/gpio18/value"))
{
    File.WriteAllText("/sys/class/gpio/export", "18");
}
File.WriteAllText("/sys/class/gpio/gpio18/direction", "out");
File.WriteAllText("/sys/class/gpio/gpio18/value", "1");
File.WriteAllText("/sys/class/gpio/gpio18/value", "0");
File.WriteAllText("/sys/class/gpio/unexport", "18");
The example above was inspired by the RaspberryPi.NET implementation.