A Mutable Log
A blog by Devendra Tewari
Project maintained by tewarid Hosted on GitHub Pages — Theme by mattgraham
Wireless Router with Buildroot and Raspberry Pi
This post shows how to build a basic wireless router, using the Raspberry Pi. It is driven by a custom Linux system built with Buildroot 2014.08, that boots up in no time at all.
Add all appropriate Kernel modules and Buildroot packages referenced in the following posts, before proceeding
Kernel Configuration
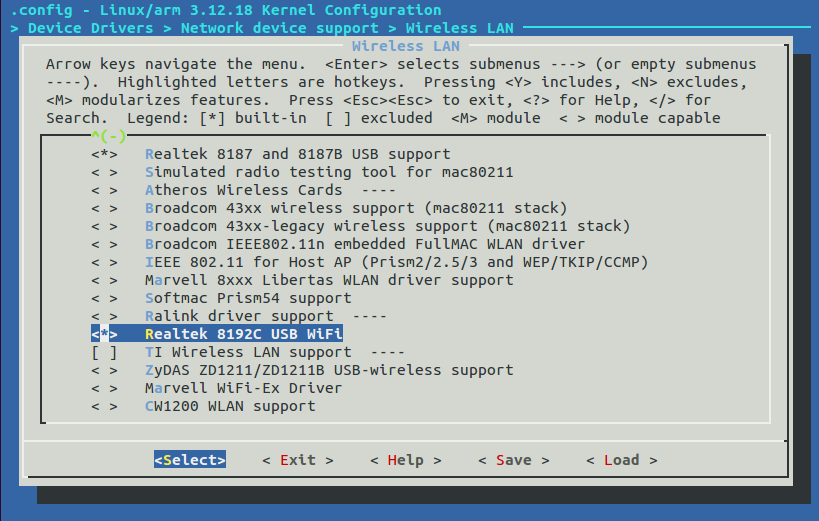
I’m using a different USB Wi-Fi adapter in this post. It has the RTL8188CUS chipset that supports access point mode. The Kernel driver is Realtek 8192C USB WiFi, available under Device Drivers, Network device support, Wireless LAN

Package Configuration
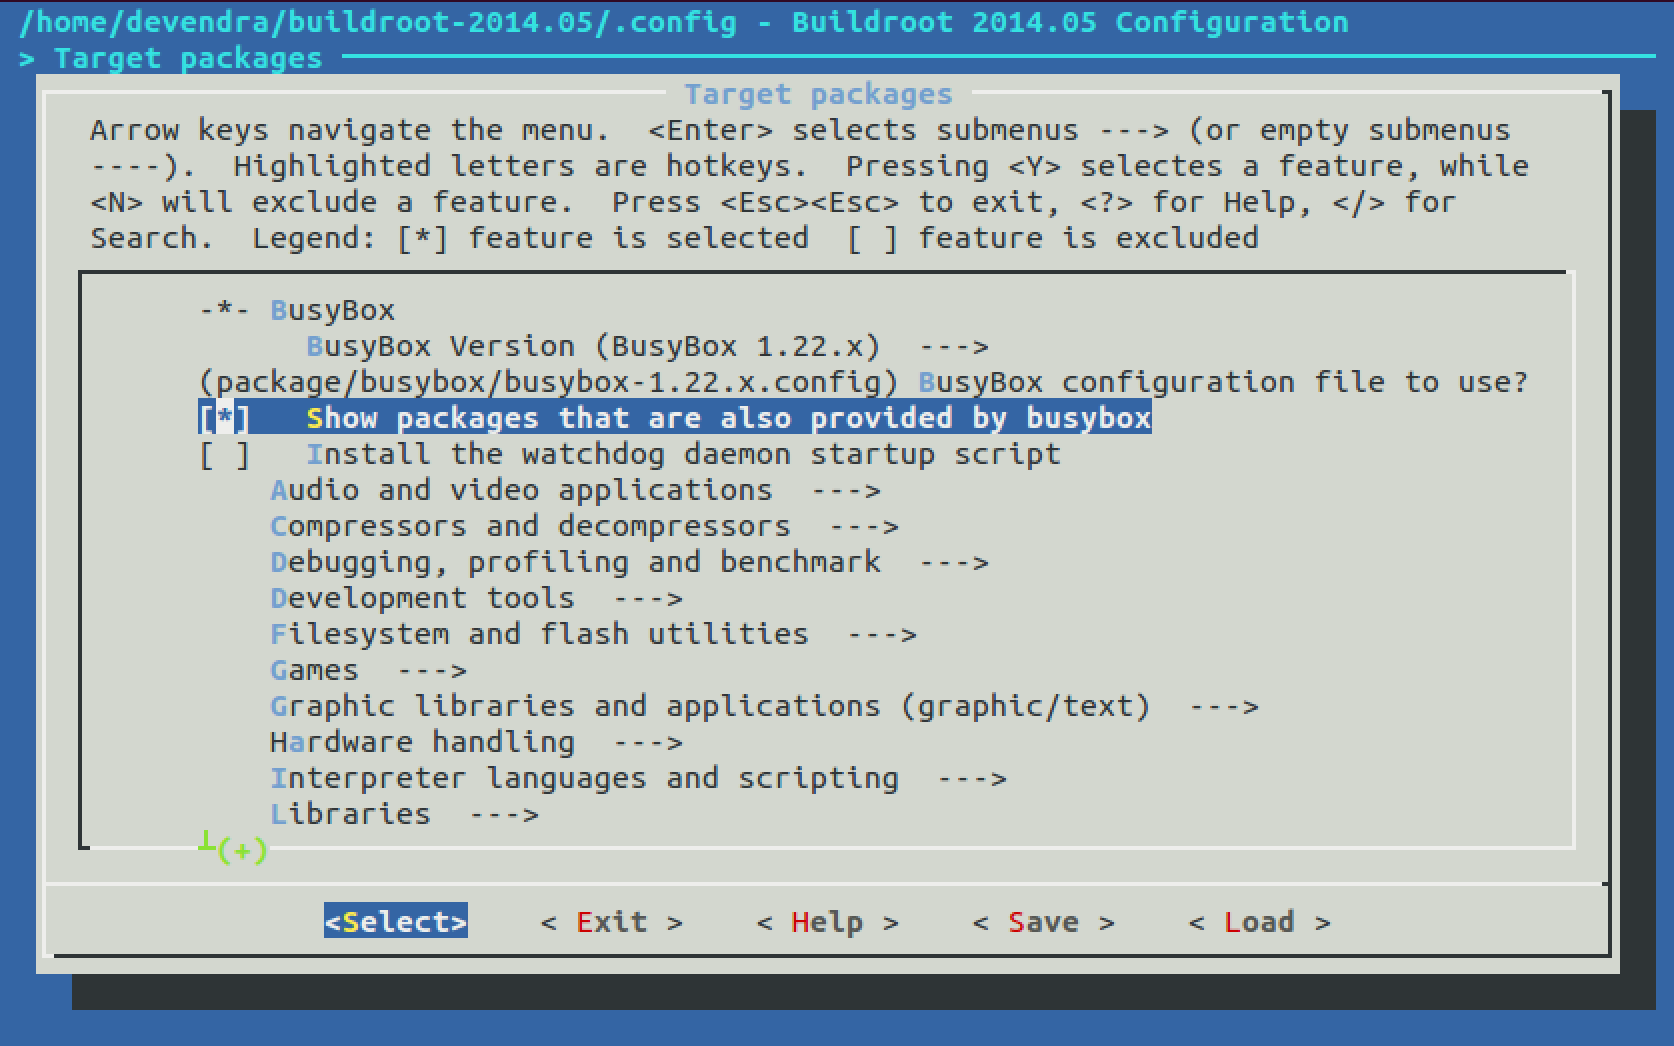
Invoke make menuconfig within the buildroot folder from a command prompt. Under Target Packages, select option Show packages that are also provided by busybox

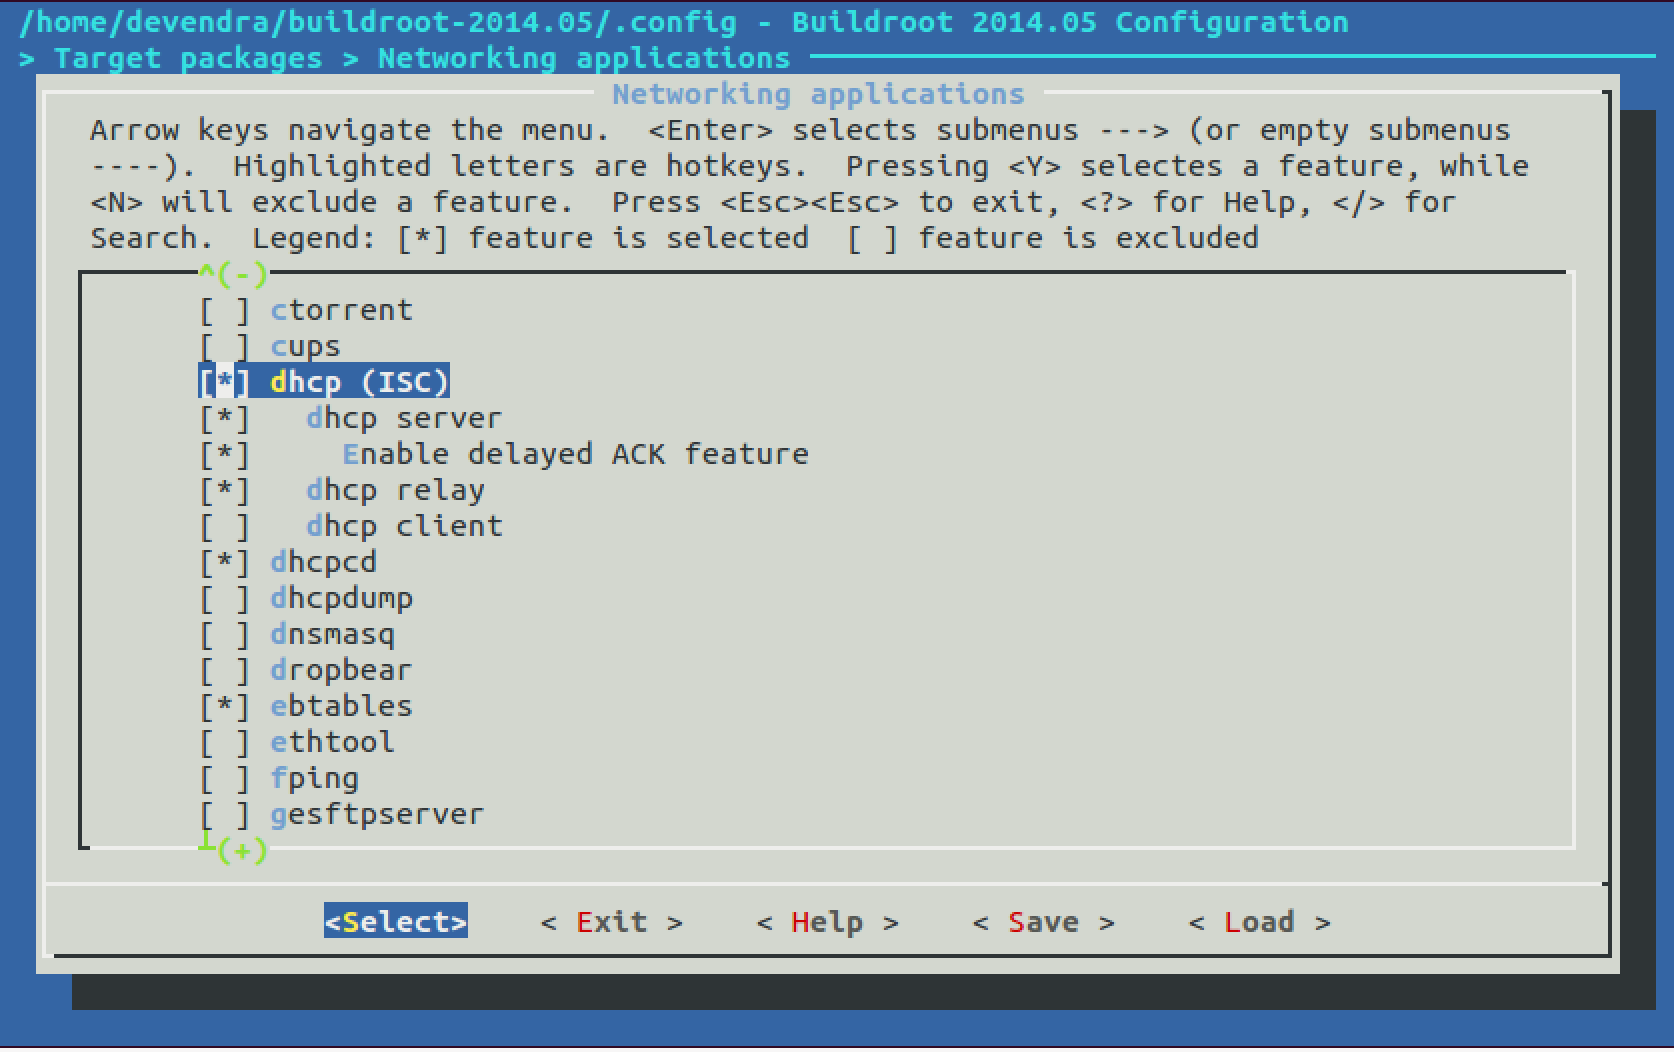
Under Target packages, Networking application, select dhcp and its sub-packages

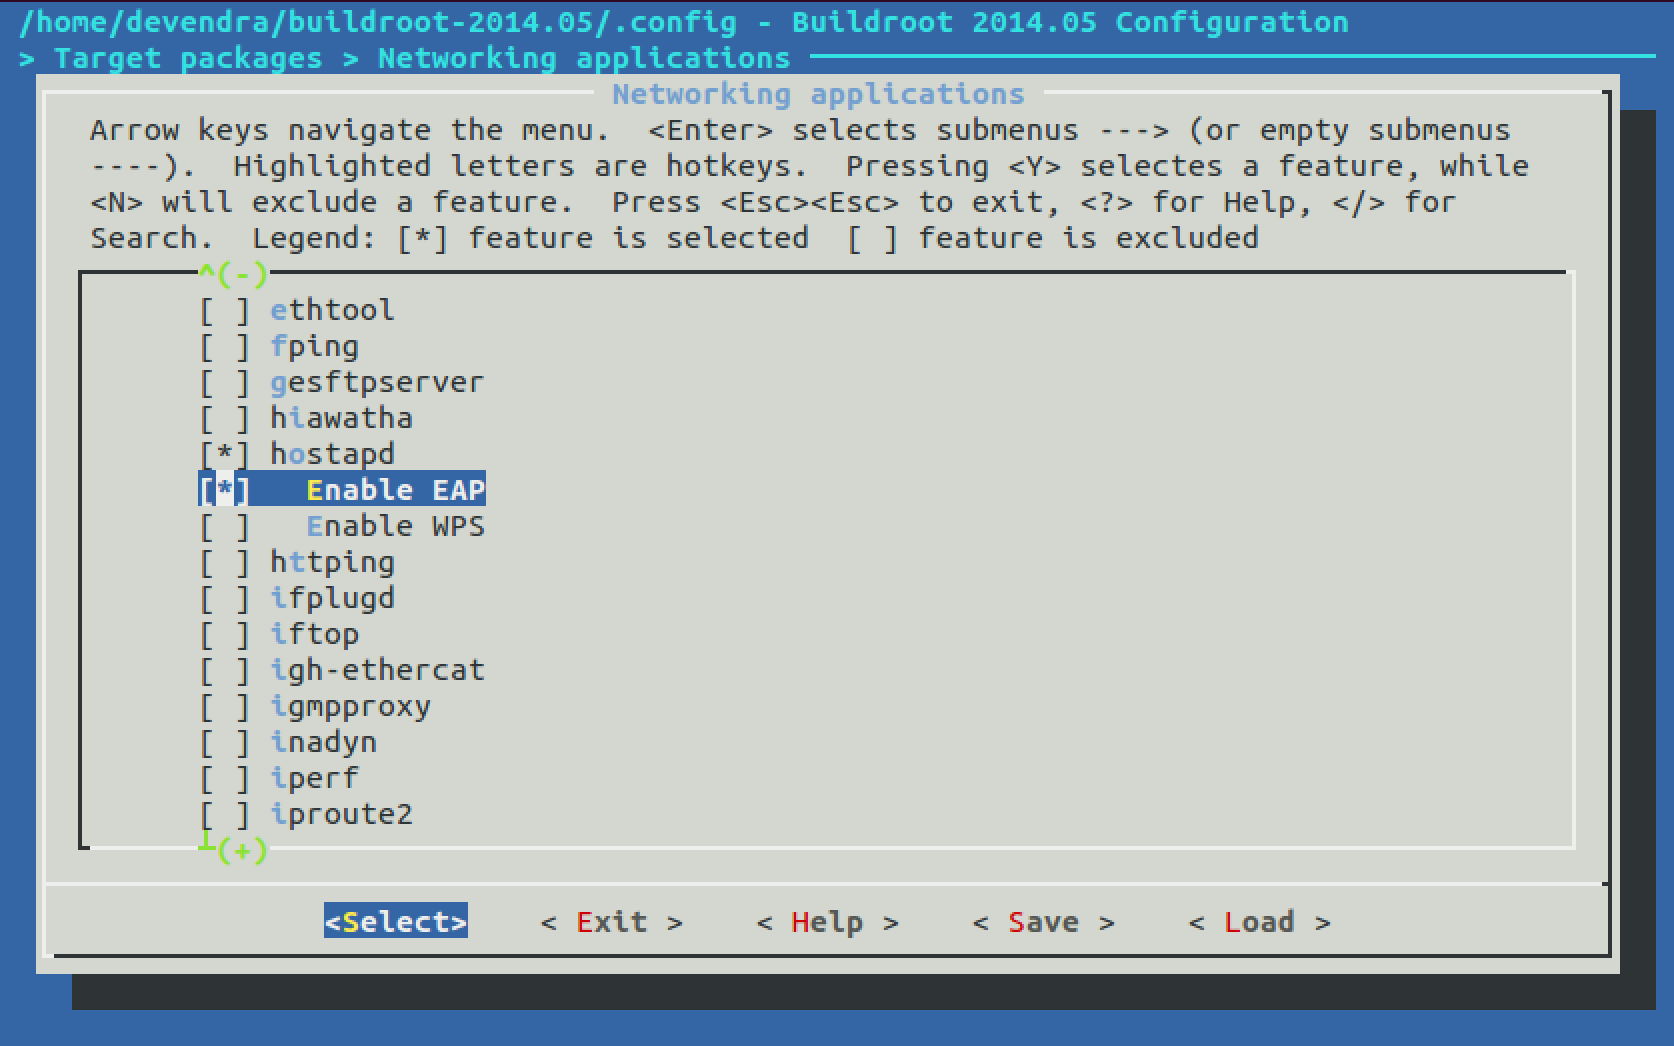
If you’re using a different wireless adapter, select hostapd and its sub-packages

Perform build by invoking make, copy the newly minted system to an SD card, and use it to boot up your Raspberry Pi.
Custom hostapd
The hostapd built by Buildroot does not work with the chosen Wi-Fi adapter. We need to build the hostapd module provided by Realtek for RTL8188CUS.
Download the driver package from Realtek. It contains the GPL source code for hostapd. In my case, I expanded RTL8188C_8192C_USB_linux_v4.0.2_9000.20130911.zip, then expanded wpa_supplicant_hostapd-0.8_rtw_r7475.20130812.tar.gz under folder wpa_supplicant_hostapd.
Proceed to folder hostapd from the command line, and use the toolchain built by Buildroot to build hostapd
export PATH=/home/parallels/buildroot-2014.08/output/host/usr/bin:$PATH
make CC=arm-buildroot-linux-uclibcgnueabi-gcc
Copy hostapd binary to SD card.
Router Setup
Bring up wireless interface with a static IP address
ifconfig wlan0 up 192.168.2.1 netmask 255.255.255.0
Or, when using iproute2
ip addr add 192.168.2.1/24 dev wlan0
ip link set wlan0 up
Configure and bring up dhcpd. Edit /etc/dhcp/dhcpd.conf. Edit following lines so that they are commented, as shown
#option domain-name "example.org";
#option domain-name-servers ns1.example.org, ns2.example.org;
Edit following line so that it is not commented, as shown
authoritative;
Add following lines at the end
subnet 192.168.2.0 netmask 255.255.255.0 {
  range 192.168.2.10 192.168.2.50;
  option broadcast-address 192.168.2.255;
  option routers 192.168.2.1;
  default-lease-time 600;
  max-lease-time 7200;
  option domain-name "local";
  option domain-name-servers 8.8.8.8, 8.8.4.4;
}
Create leases file
touch /var/lib/dhcp/dhcpd.leases
Instantiate dhcpd
dhcpd -cf /etc/dhcp/dhcpd.conf
Configure and bring up hostapd. Create file /etc/hostapd/hostapd.conf with
interface=wlan0
driver=rtl871xdrv
ssid=pi
hw_mode=g
channel=6
macaddr_acl=0
auth_algs=1
ignore_broadcast_ssid=0
wpa=2
wpa_passphrase=raspberry
wpa_key_mgmt=WPA-PSK
wpa_pairwise=TKIP
rsn_pairwise=CCMP
Run hostapd
hostapd -B /etc/hostapd/hostapd.conf
Try driver=nl80211 if you’re using a new netlink interface compatible driver. If you get the following error when starting hostapd, you probably need a different driver
Configuration file: /etc/hostapd/hostapd.conf
Line 2: invalid/unknown driver 'nl80211'
1 errors found in configuration file '/etc/hostapd/hostapd.conf'
If you get the following error using the Wi-Fi adapter mentioned earlier, you need to use the Realtek hostapd compiled above, with driver=rtl871xdrv in hostapd.conf
rfkill: Cannot open RFKILL control device
nl80211: Could not configure driver mode
nl80211 driver initialization failed.
hostapd_free_hapd_data: Interface wlan0 wasn't started
Join the pi network from any other device using password raspberry, and you’re good to go.
Configure NAT routing, if you want to access internet over the wired ethernet interface, like so
echo 1 > /proc/sys/net/ipv4/ip_forward
iptables -t nat -A POSTROUTING -o usb0 -j MASQUERADE
iptables -A FORWARD -i usb0 -o wlan0 -m conntrack --ctstate ESTABLISHED,RELATED -j ACCEPT
iptables -A FORWARD -i wlan0 -o usb0 -j ACCEPT
Where usb0 is a WAN interface on my Raspberry Pi.
Check how your default route is configured, with
netstat -nr
OR
route
If default route is set for usb0, add route through wlan0 for subnet 192.168.2.0, thus
route add -net 192.168.2.0/24 dev wlan0